Updating Product Pricing & Plan on Simply Cue
This document provides a step-by-step guide to help you modify the pricing of a product on Simply Cue. Whether you are updating an existing plan, adding a subscription model or creating an elite pricing plan, this guide covers all essential steps to tailor your offerings to better serve your audience.
Step 1: Access the Pricing Section
- Log in to your Simply Cue dashboard.
- Navigate to the Product Listing page.
- Select the product you want to edit and click on Edit Product.
- Head over to the Pricing tab.

Step 2: Understand Your Pricing Options
Inside the Pricing tab, you can:
- Add or update plan types (e.g., one-time, subscription or part payment)
- Customize checkout fields
- Set up advanced sale settings

Step 3: Modify or Add Plans
Each product can have up to four plans (archived plans not counted).
To edit or create a plan:
- Go to the Plan tab.
- Select an existing plan to update or click Add New Plan.
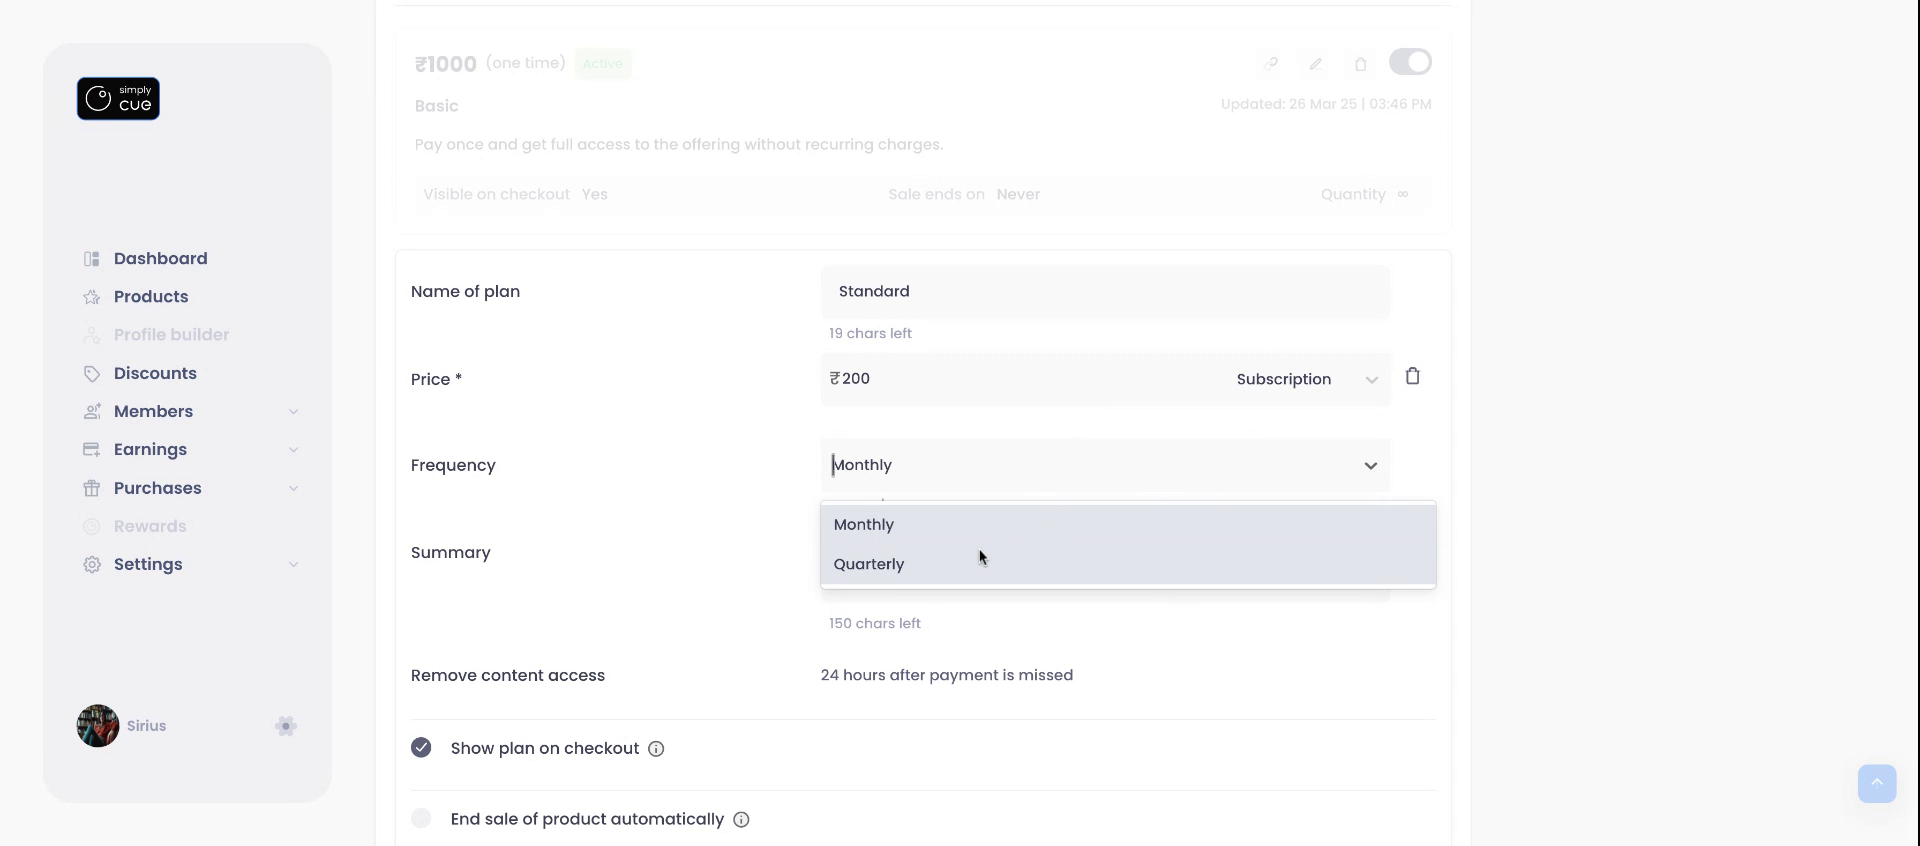
- Choose the plan type:
- Standard: One-time purchase
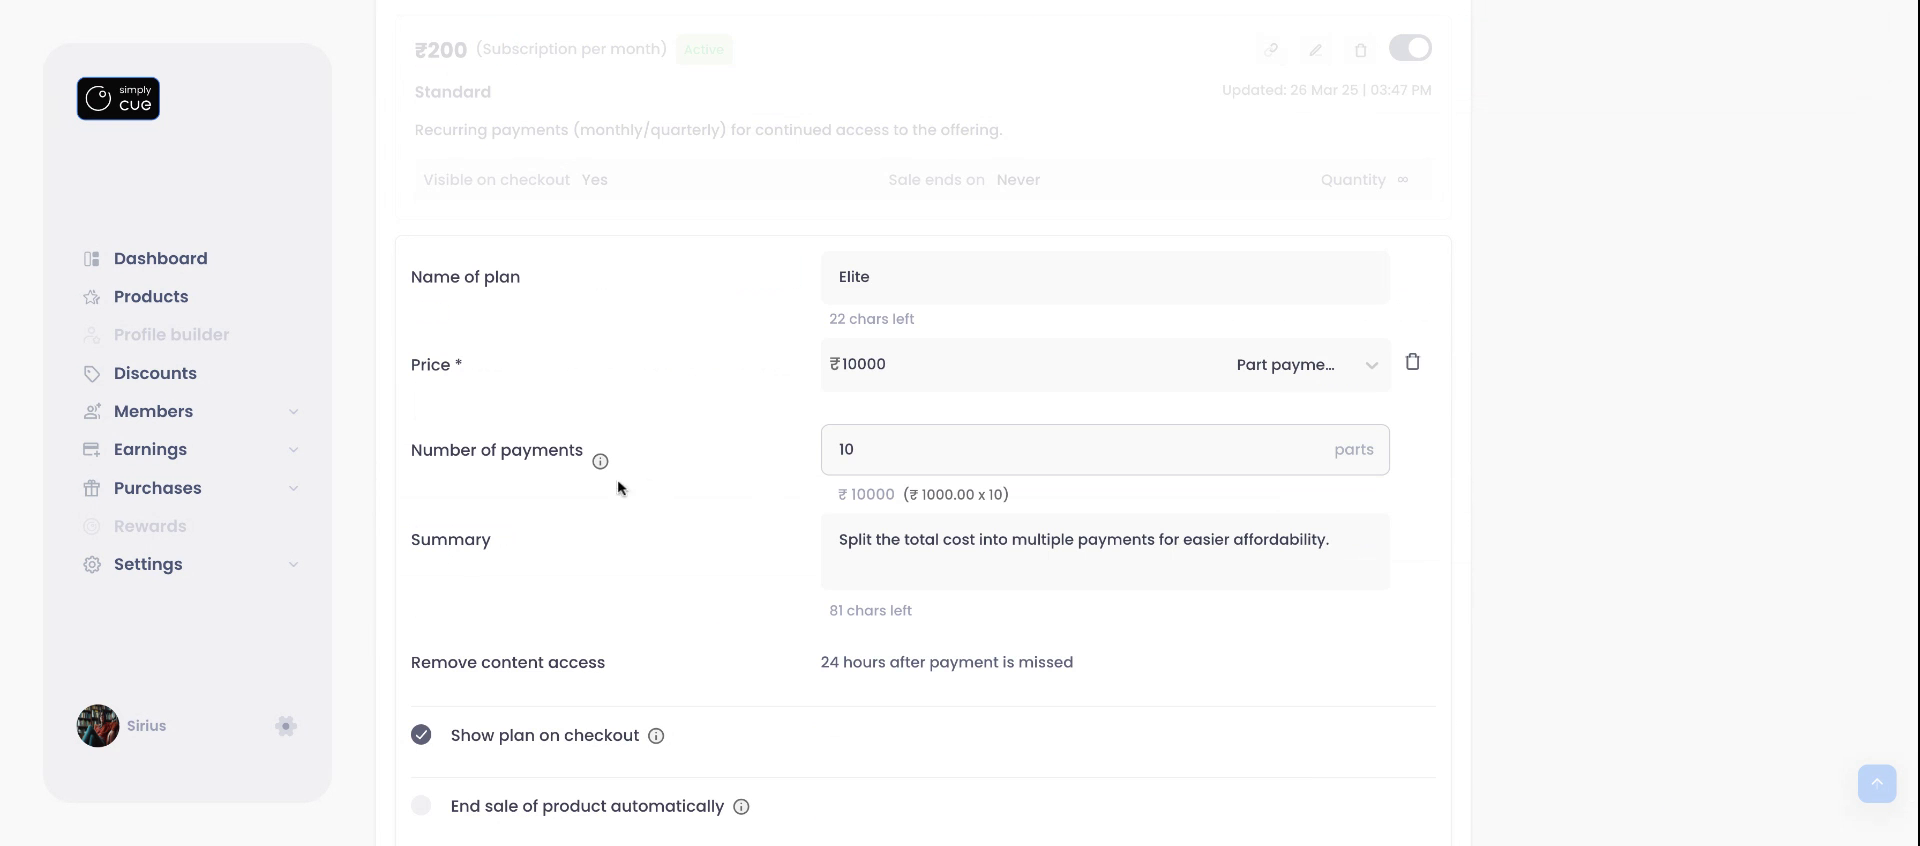
- Subscription: Recurring payments (monthly/quarterly)Part Payment: Installment-based pricing
- Standard: One-time purchase
- Add a short summary to describe the plan.
Step 4: Configure Plan Settings
Use the following toggles to customize:
- Show plan on checkout: Display or hide plan on public checkout.
- End sale automatically: Set a sale deadline.
- Set quantity limits: Limit how many units can be purchased.
- Slash pricing: Display original price with a strike-through to highlight discounts.
Once all changes are made, click Save.

Adding Subscription
Now, let’s create a different pricing model.
Subscription Plan Example:
- Choose Subscription as the type.
- Set frequency: Monthly or Quarterly.
- Add summary and save the plan.
Note: If a payment is missed, member access is revoked within 24 hours.
Ensure all details are correct then click save.
Adding Part Payment
Add another Part payment plan.
- In the Price field Add the final price of the plan.
- Offer part payment installments for affordability.
- You may hide this plan from the general checkout view to limit access (optional).
- Copy the unique plan link to share it privately with select members.
Click “Save” to finalize the plan. To share, copy the plan link and give it to members directly.
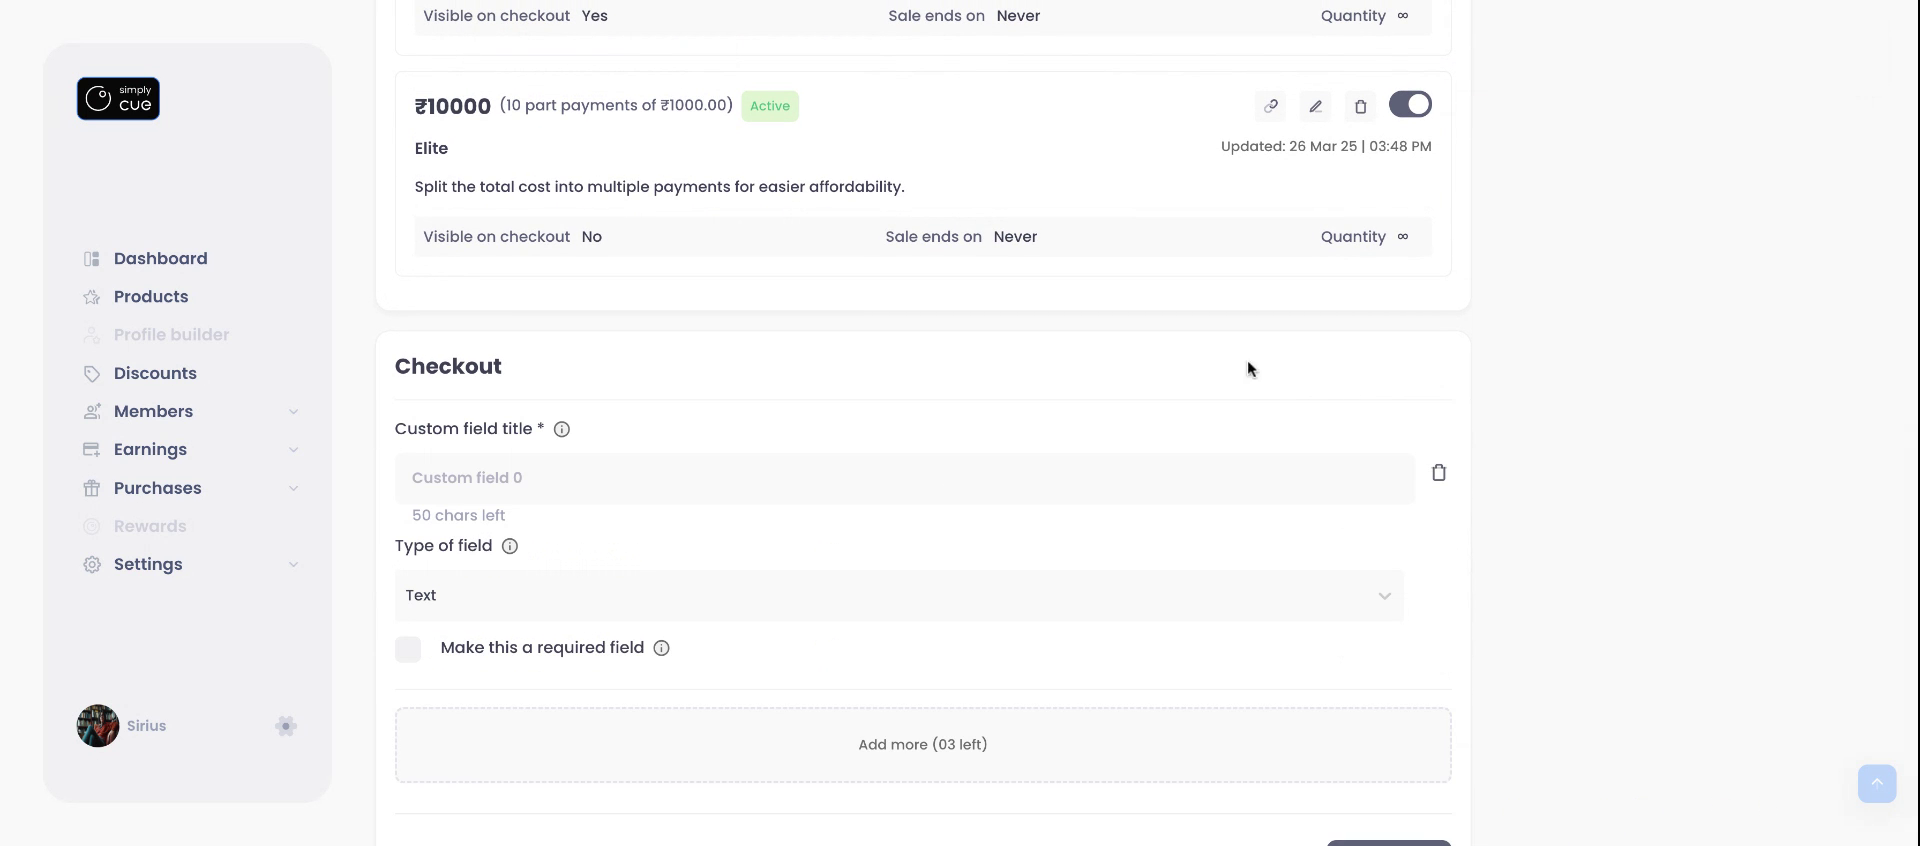
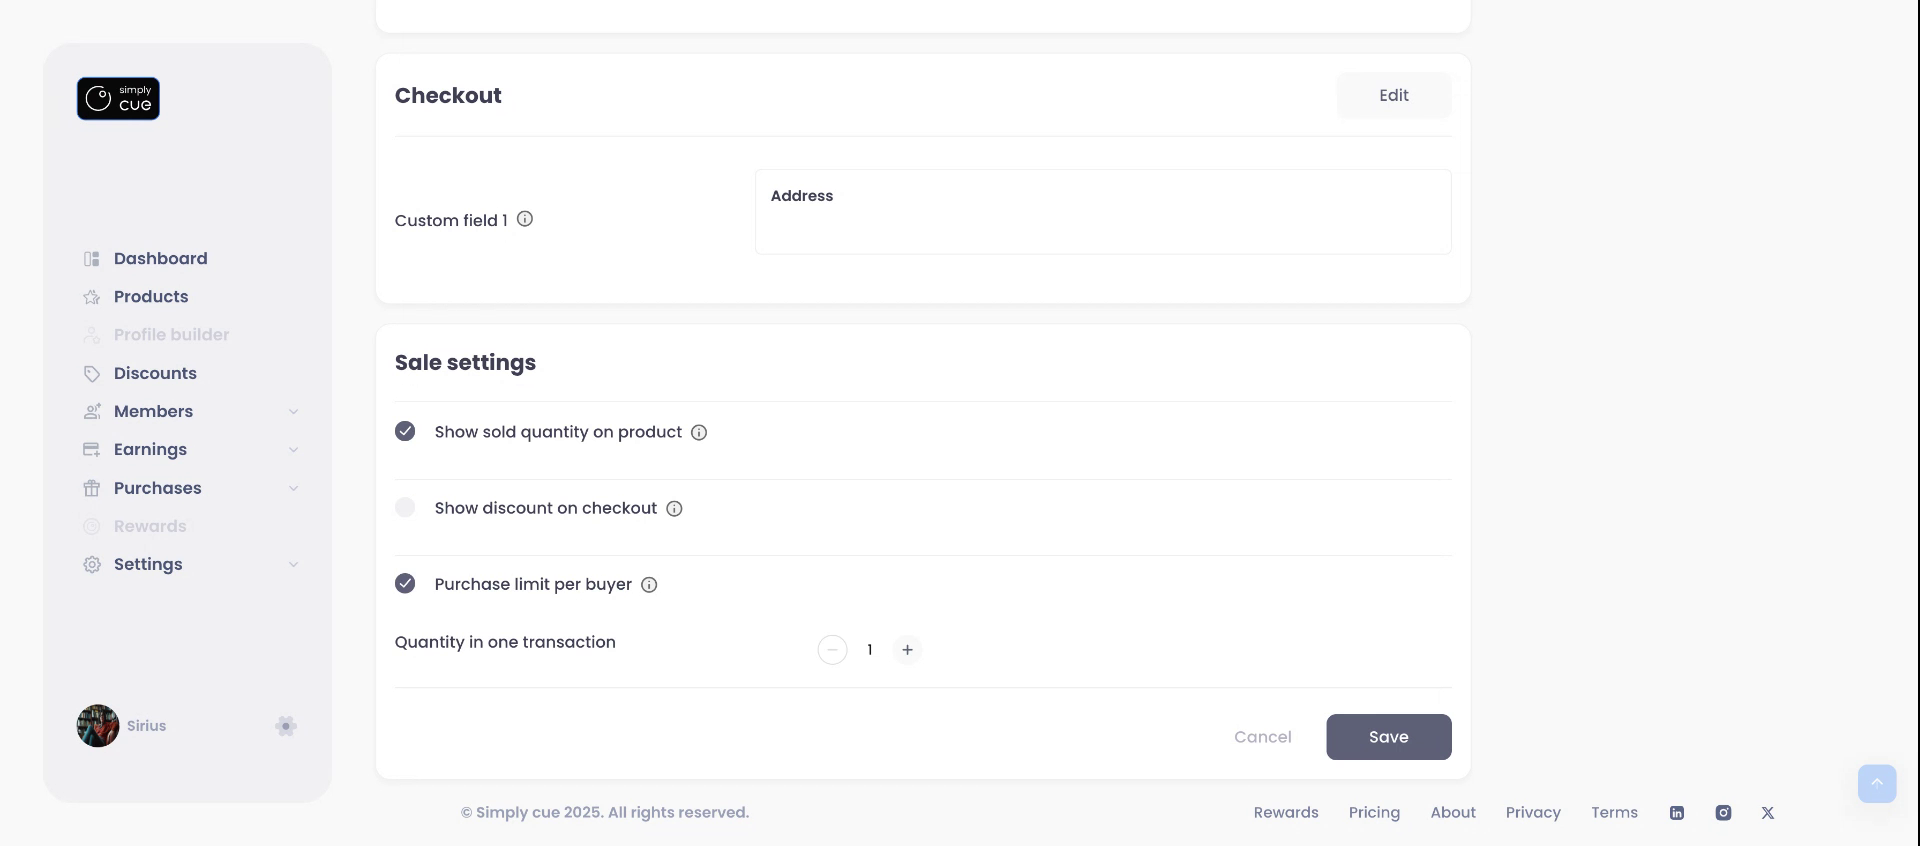
Step 5: Add Custom Checkout Fields
Next, add custom fields to the checkout page to gather more information. By default, email and phone numbers are collected.
- Optional fields:
- Text (short input)
- Multiline (for address or notes)
- Checkbox (for agreements or opt-ins)
- Text (short input)
You can mark any field as required.
Click Save when done.
Step 6: Explore Sale Settings
- Show sold quantities to build trust.
- Enable discounts (for one-time plans only).
(Refer to the discount article for more in-depth guidance.) - Limit number of units per member (buyer)
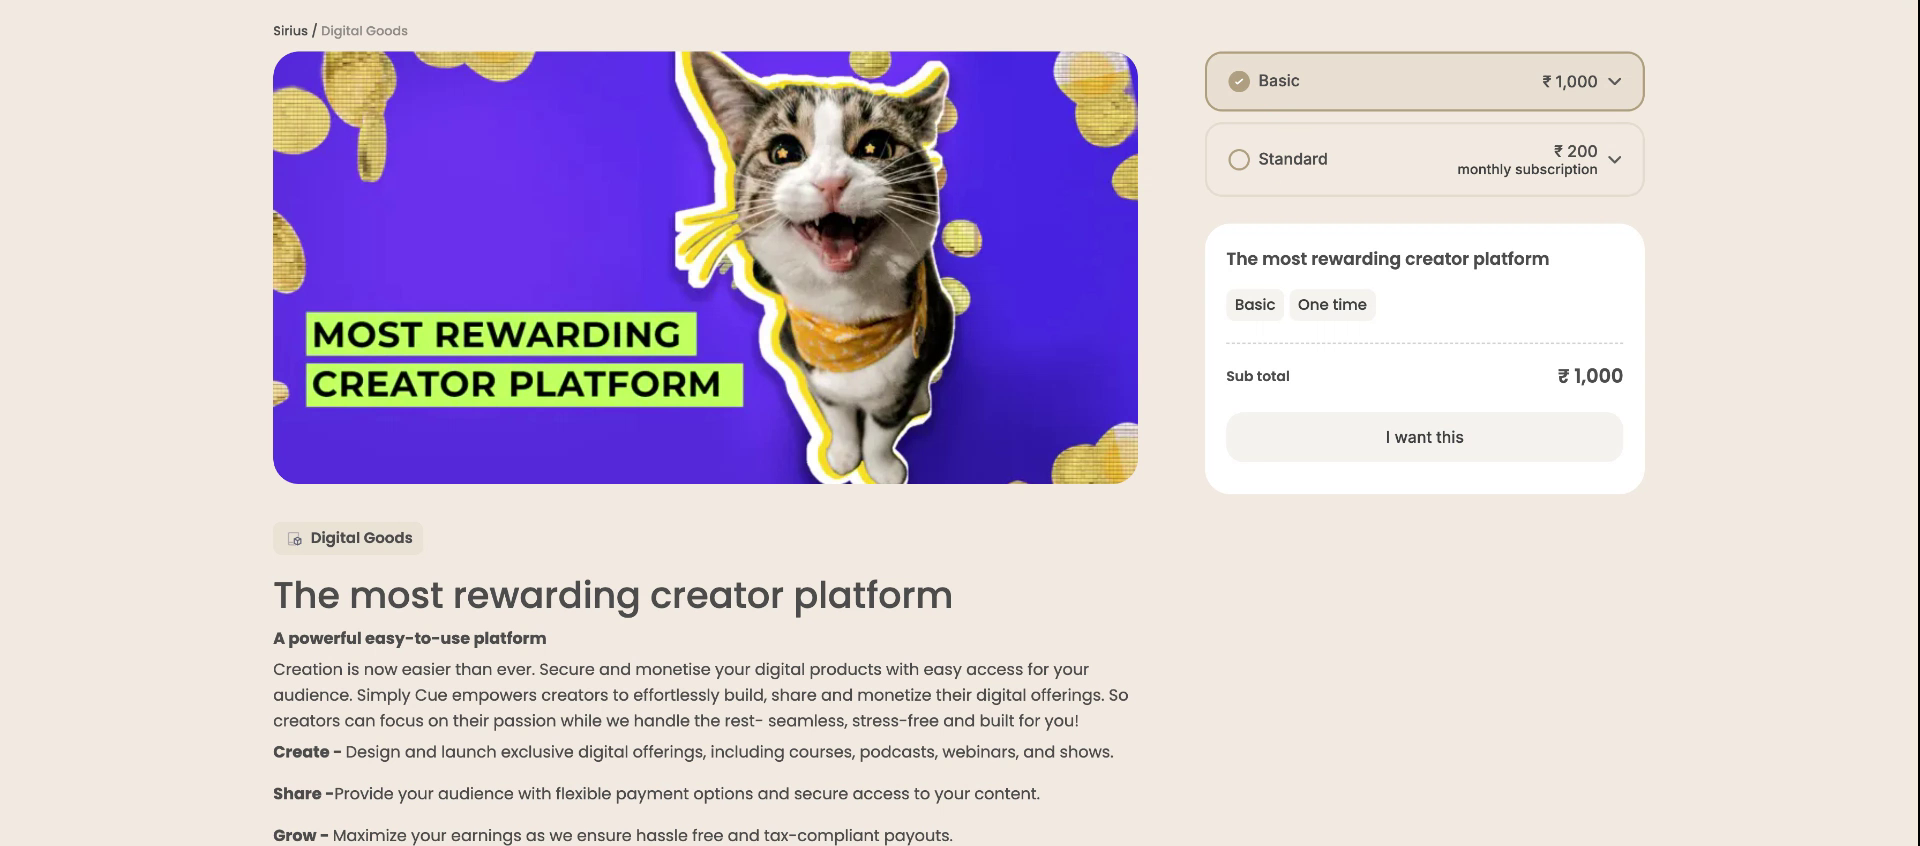
Step 7: Preview & Share Pricing
To review how your pricing appears to members, copy the product link.
Want to promote a specific plan? Copy the unique link from the Create Pricing tab and share it directly.
You’re all set! Your pricing is now updated and optimized for sales.
If you need our help in setting up a discount or planning a launch strategy, check out the Discounts Help Guide under our help guides.


